D is for duck wings
June 21, 2013
Just a quick warning these will not help your children to fly even if they think they will! You might need to state that at the beginning, these are just for pretend 🙂

You will need
- Card, cereal boxes would work
- sewing elastic
- Glue
- Feathers ( I pulled some feather boas apart but you can find bags of feathers in craft stores)
- A hole punch or scissors and blue tac
- Scissors
- Pencil
Method
Draw freehand on the card a wing shape, mine looked like this but the children might have their own ideas, and they can be what ever size they want but bigger is more fun!

I had to cut out the shape as the card I used was too thick for my son to even attempt it, but the children can have a go if they can manage it. Then make two holes at least an 5cm apart in the top of each wing. If the card is thin enough this can be done with a hole punch but if it is too hard adult help is required. Place a ball of blue-tac under the wing where you want to make the holes and push a pair of scissors through the card into the tac to make a hole, this protects fingers and tables from damage, but has to be done by an adult. Then thread a piece of elastic through the holes and tie off to make a loop. To get the right amount of elastic I measured it round my sons upper arm, and cut the required length.

Next come the rather messy part. Cover the wing in glue and stick feathers all over it, trying hard not to stick feathers to fingers and table tops. Leave them to dry and then shake off any excess feathers before they get spread round the house by enthusiastic children! Slide the elastic up their arms and I suggest letting them ‘fly’ round the garden for a bit.


(Jumping off the sofa and flapping hard to see if he could fly and glide)
Tips/notes/other ideas
Just make sure the elastic is not too tight on their arms as this will lead to loss of circulation to their hands and fingers! With my wing shape I made the longer, straighter edge the ‘top’ edge and this is what went along the arm with the rest of the wing curving behind, but the children might have completely different ideas. You could always have various colours of feathers and make them parrot wings instead. Finally thank you to my sons school teacher who came up with the original idea for a school production.
C is for crocodiles
May 21, 2013


Preferably with lots of teeth!
You will need
- Two washed fruit containers ( we used cherry tomato and strawberry containers from the local supermarket) preferably with one side deeper than the other when you open it up. You need two per crocodile
- Green tissue paper torn into strips
- glue
- Green and white card
- A circle template and and eye template ( see below) ,or have these already cut out for the children
- A pencil
- Sticky tape
Method.
Turn the containers over and stick the two deepest halves together, then turn it back over and cover the container with the tissue paper, using lots of glue to stick it down!


As it is drying cut out the teeth and the eyes. For the teeth simply cut some triangle shapes from the white card, and when the crocodile is dry use sticky tape to stick them on the inside of the crocodiles mouth. It is easier to do this before gluing on the eyes.

( My son insisted that his crocodile had to have teeth all the way round his mouth! )
For the eyes cut out two of these shapes,

from the green card and fold about 5-10mm of the bottom over, this is to glue them on with. Cut circles from the white card using a template ( I used a 10c coin) and stick them onto the green. Draw on the pupil of the eyes, remembering that crocodiles have eyes like cats, and then using the folded end glue them onto the head of the crocodile.


Tips/notes/other ideas
If the children are capable of cutting with scissors they can cut out their own crocodile eyes, they might not be exact but they will be individual. If not you might have to have these eyes already prepared, or at least the separate parts which they can then glue together. If you are waiting for the bodies to dry you could read ‘The Enormous Crocodile’ by Roald Dahl to pass the time!
Stars!
December 22, 2012
These are reasonably quick to make but took a while in my house as the children kept running off with the separate parts to make crowns or bracelets or swords…
You will need
- An empty cereal packet
- Sticky tape
- Wrapping paper or thick ribbon
Method
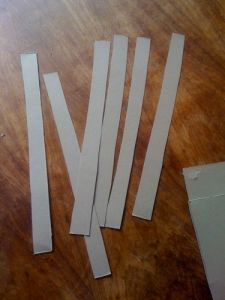
Simply cut from the packet three or six strips for each star, depending on which star you want to make, for each child. The strips can be as long or short as you want, ideally you want them to be the same length in the same star, however if the children are cutting this may not be the case!
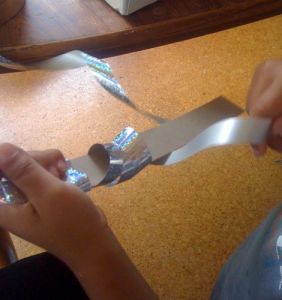
Cut some strips from the wrapping paper, or a length of ribbon. Secure one end of the ribbon or paper to one end of the cardboard strip with sticky tape and wrap it around the cardboard until you reach the end or run out of ribbon/paper. Keep going until all of the cardboard strip is covered.
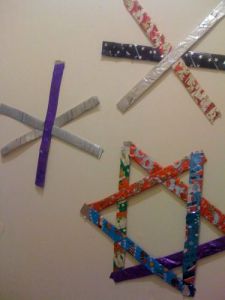
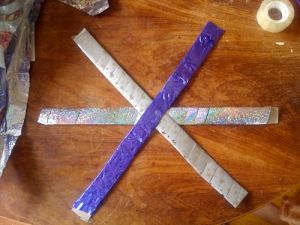
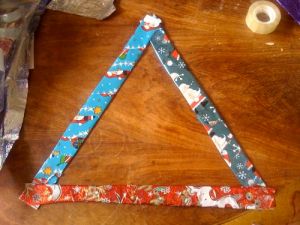
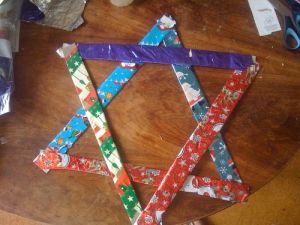
Repeat this for each cardboard strip. If you are making the three strip star place the three pieces on top of each other and secure with more sticky tape. If you are making the star of David, first construct two separate triangles using sticky tape to keep them together, then lay one triangle on top of the other to make the star. More sticky tape will hold it all in place!
Tips/notes/other ideas
These can be either hung from a ribbon or stuck to a wall, we chose to stick ours up on the wall. Use thick ribbon or strips of wrapping paper, it is less frustrating for smaller children as it covers more and faster than thin. If you object to a well known cereal brand peaking through some of the wrapping you could paint the strips first or use large paddle pop sticks instead.
